


Tech Hack For Charging Phones – The cheaper a needed item you can have, the less money you spend. Tech hack is something that can make you spend less money to have a technology item you need. This article will talk about to have a solar cell phone charger. This is a charger that is used green solar as the power for the gadgets. If you buy this kind of charger, it usually costs $60, but if you make it for yourself, you can spend only less than $20.
Tech Hack For Charging Phones
DIY Technology Hacks
If you want to have a solar cell phone charger, then don’t have to worry about spending a lot of money. This tech hack is not stuck on the wall like the other electrical outlets. You can put it everywhere to help you charge your phones. Plus, it does not need any electrical outlet to charge since the solar light is the power for charging your gadgets. Here are the steps to make it happens.
How to Do It
The technology hacks and tips are:
1. Preparing the components
What you need to make it
- USB charging circuit
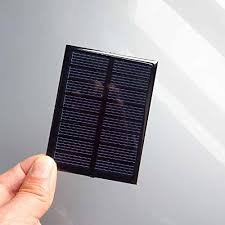
- Solar panel 4V or greater
- AA battery holder
- AA rechargeable batteries
- 1N914 Diode
- Kingfisher Tuna Tin or others that are similar to it
- The tools you need to prepare are
- Soldering iron
- Solder
- Tin snips
- Melt glue gun and its glue
- Tape
2. The steps
- Prepare DC to USB converter circuit. It is to install the gadget using USB in this tech hack-charger
- Put AA power-on course to power it, and it is to charge the gadget
- Choose the rechargeable AA battery that is between 2000-3000 ma
- Get the solar cell that fits into the Kingfisher Tuna Tin. 4V solar cell could be perfect for it. The bigger solar cell will produce more power, but the bigger solar cell will not fit into this tin.
- Attach the wire to the solar cell by connecting 1N914 Diode directly to the positive solder tab on the solar panel. When you solder it, you must ensure that the black bar that is on 1N914 Diode is a point away from a solar cell. The Negative side is the black bar. Do not get wrong to install it because if it placed in the wrong direction, it would prevent the power flowing into the circuit.
- If it is in the correct direction, then, solder the Diode’s positive that is not the black one to the positive solder point on the solar cell. Solder wire to the other end of the Diode.
- Connect battery pack then solder it.
- Prepare the charger and install it onto the circuit
- To be able to pass the head of USB port, cut the tin to make a big hole to pass through the USB port
- Glue everything to make it firm including the bar circuit board onto the tin
- Enjoy the portable charger of your gadget anytime and anywhere.
Now, you have solar power for your source of electricity in charging your gadgets, especially your phones.
Read More: